


SWITCH BETWEEN WINDOWS FASTER WITH TOPDESK
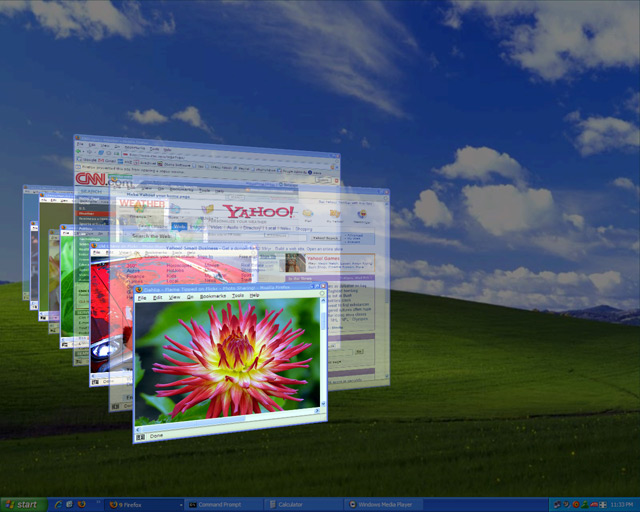
TopDesk radically reduces the time you spend switching between tasks by giving you the ability to quickly find the window you want from a thumbnail view.
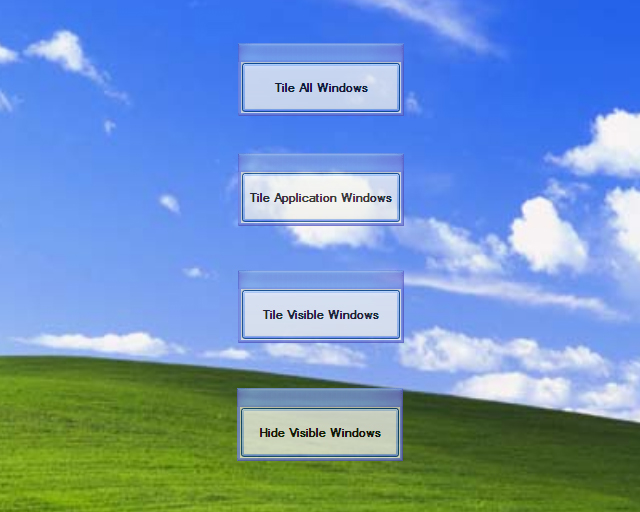
With a single key press you can instantly view thumbnails of all open windows, display thumbnails of windows belonging to the current application, or hide all windows to quickly access the desktop.
THE CLOSEST THING TO EXPOSE ON WINDOWS
The Expose feature of Mac OS X is regarded by many as the most elegant and user-friendly way to switch between windows, and is considered to be one of the features that sets OS X apart from Microsoft operating systems.
TopDesk brings a Mac OS X Expose-like experience to Windows XP and Windows Vista.
FEATURES AND BENEFITS
TopDesk dramatically enhances your window switching experience, allowing you to:
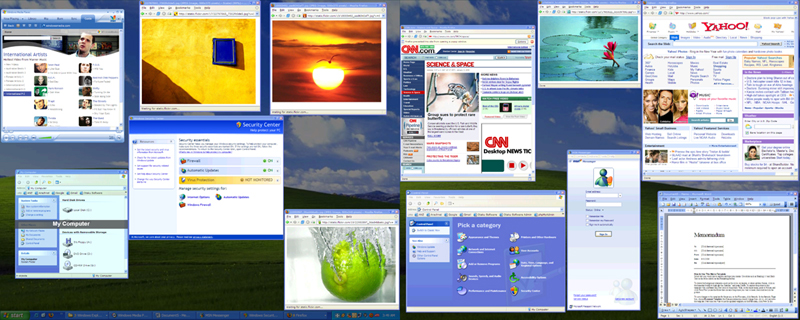
- Swiftly select a window from an Expose-like or Flip3D-like view thumbnail view of all windows, including minimized windows.
- Rapidly switch between an application's windows using a thumbnail view of all windows that belong to the current application.
- Instantly access the desktop by hiding all windows.
- Find windows faster by displaying window thumbnail titles.
- Manage your windows by closing, minimizing, and restoring window thumbnails.
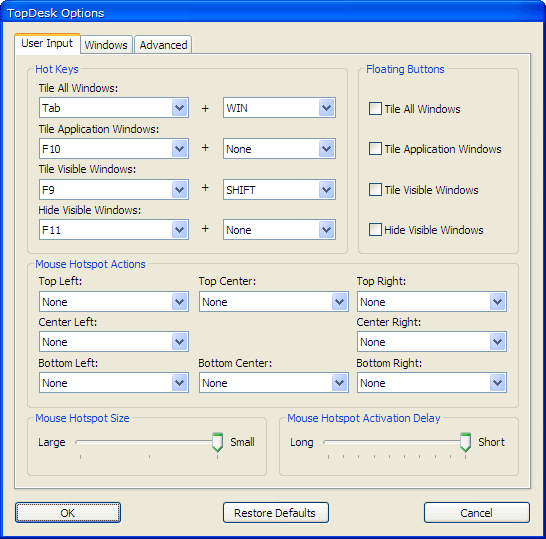
- Configure the user inputs that display window thumbnails, and change window thumbnail and performance settings.
- Quickly drag-and-drop items by holding them over window thumbnails.
- Display window thumbnails on multiple monitors.
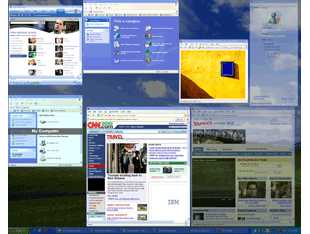
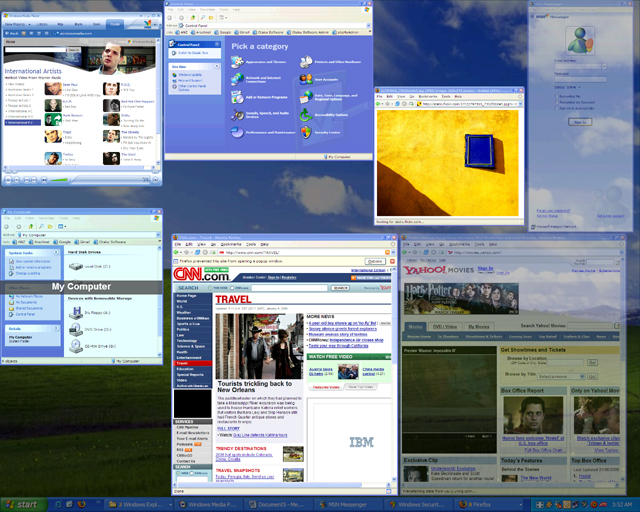
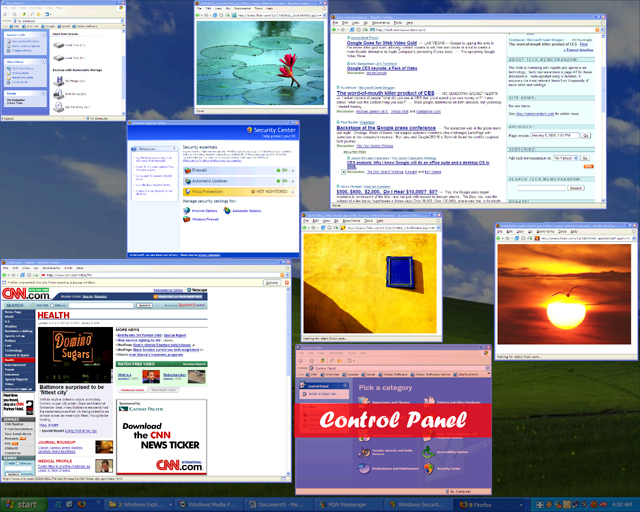
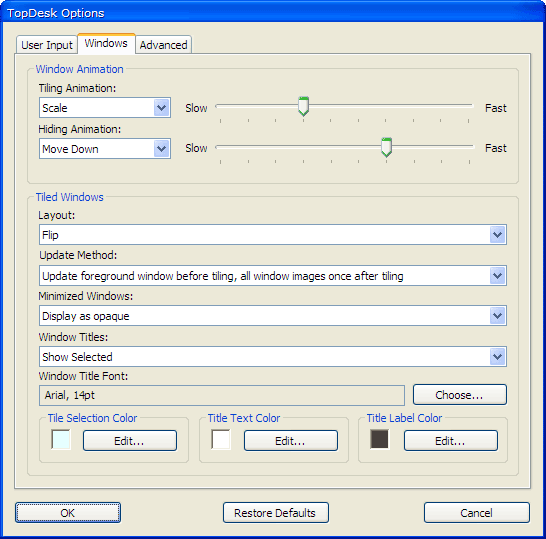
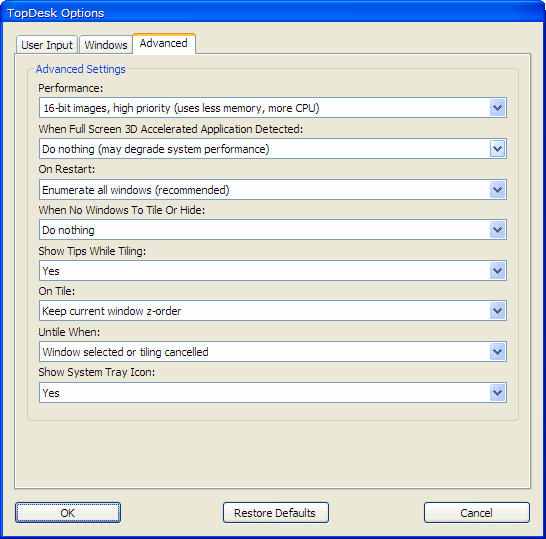
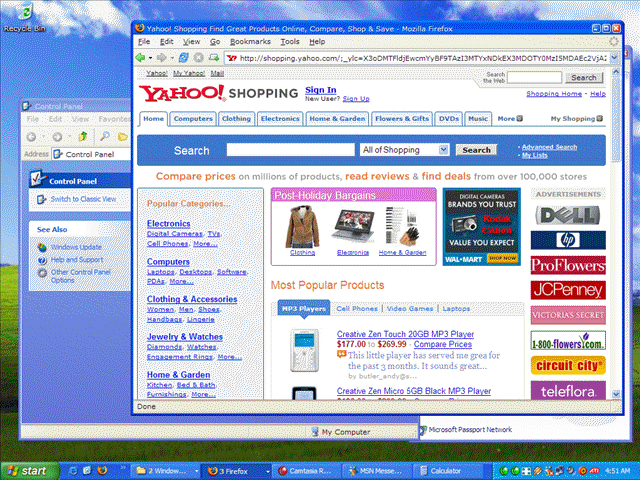
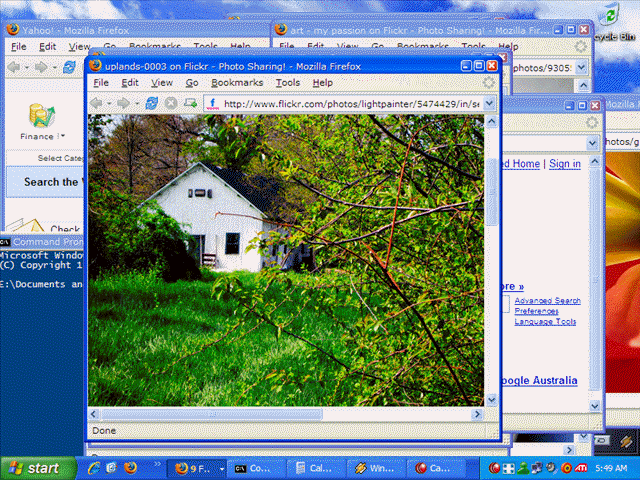
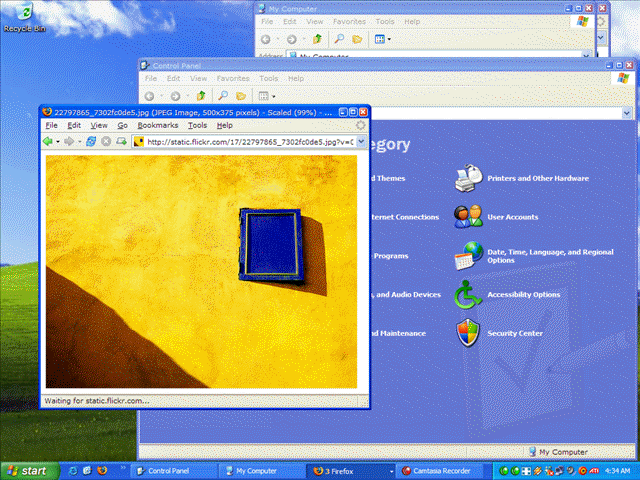
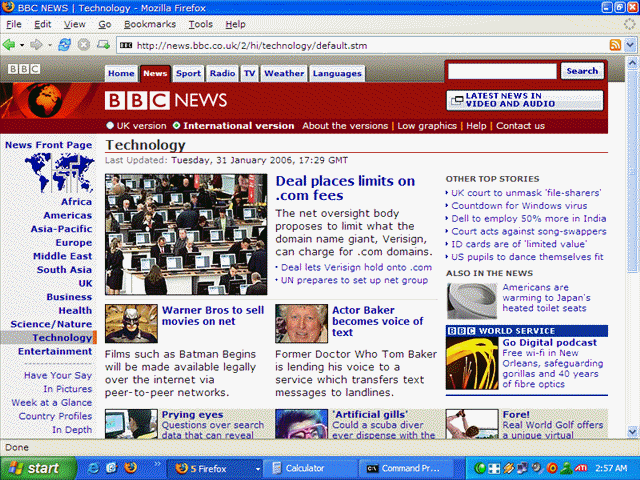
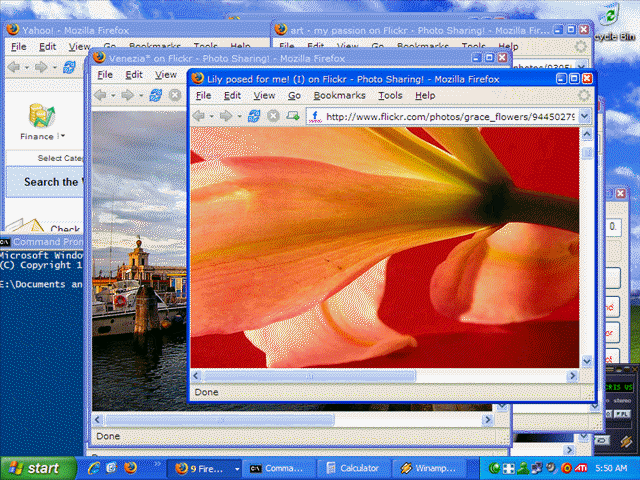
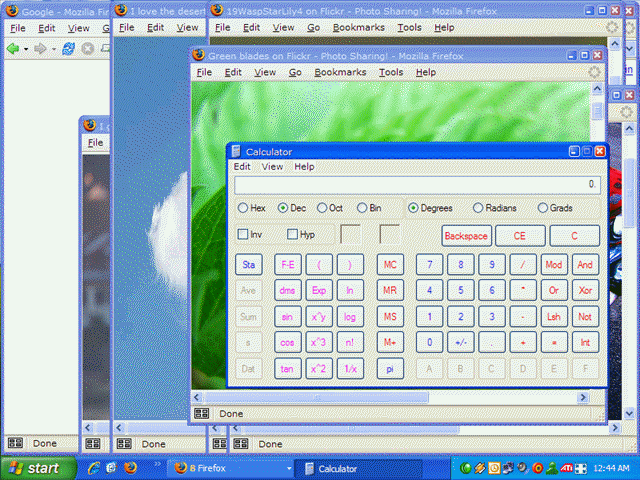
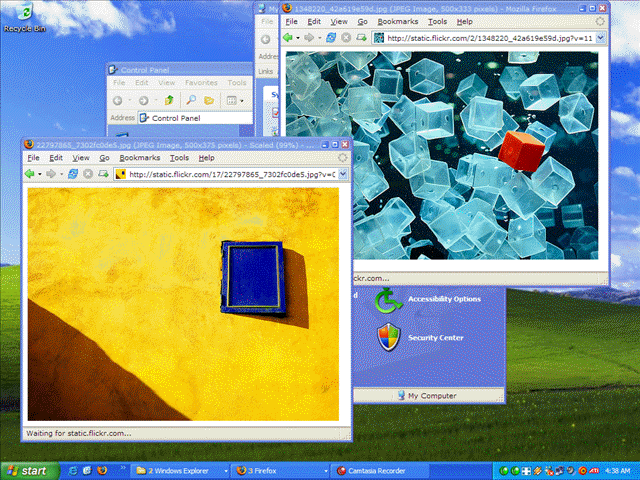
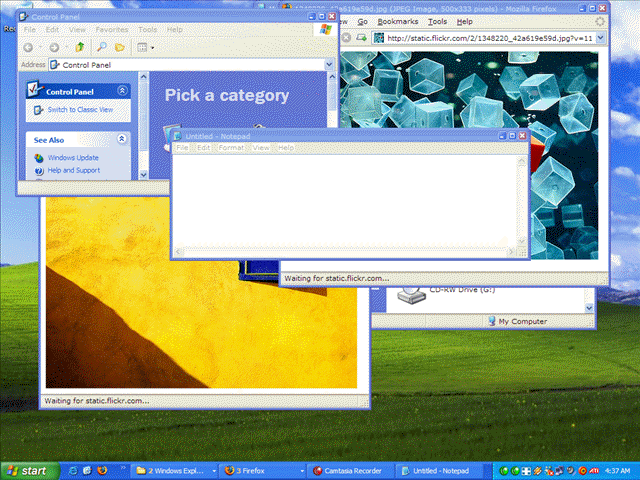
SCREENSHOTS
Click a thumbnail to view a larger image

VIDEO
Click a thumbnail to view a video
TESTIMONIALS
"If you're using Windows XP and want to try out one the cooler of Vista's 3D graphics features, TopDesk is the tool for you."
"Finally, my search for a decent Windows Task Switcher is over."
Steve Bass, PC World
Scott Hanselman, Computer Zen
"TopDesk is exactly what I was looking for. Completely configurable, it is lightning fast, smoothly animated and it makes working with multiple windows on the desktop fun and easy."
"I've been using it for half an hour, and I have to say, I'm excited to have this piece of software on my PC."
James Kendrick, jkOnTheRun
David Ponce, OhGizmo
"TopDesk is a leader in its field."
"TopDesk is my new Alt-Tab."
Leon Bambrick, SecretGeek
"TopDesk's Expose-like interface just blew me away. Combined with superb configurability and ease of use, it makes for simply great software."
"I purchased TopDesk months ago when I found that it had the best Expose emulation for Windows XP."
Alex Le Dain, Eternity Software
You can also read about TopDesk in Wired, PC World, and the G4 TV Attack of the Show Damn Good Download blog.
SYSTEM REQUIREMENTS
The minimum system requirements for TopDesk are:
- Windows XP SP2, Vista, Vista 64-bit, Windows 7, Windows 7 64-bit, Windows 8, or Windows 8 64-bit.
- 800 Mhz CPU.
- 256 MB RAM.
- 16 MB DirectX 8.1 compatible video card *.
* Minimum ATI Radeon 7200 or nVidia GeForce 2 required. Video cards based on the nVidia TNT2, ATI Rage Pro/128, and Intel Extreme chipsets may work, but are not supported.
WHAT'S NEW?
Click here to find out what's new in the latest version of TopDesk.
FREQUENTLY ASKED QUESTIONS
Can I try TopDesk before I buy it?
Yes, in fact we recommend that you try TopDesk before you buy to make sure it's exactly what you're looking for. Click here to download a 14 day trial version of TopDesk.
Is TopDesk compatible with other programs on my computer?
Yes, TopDesk is compatible with most other Microsoft Windows programs. If you'd like to make sure TopDesk works with all your programs, click here to try TopDesk before you buy.
Can I turn off TopDesk when I don't want to use it?
Yes, you can turn off TopDesk at any time.
How do I install TopDesk on my computer?
To install TopDesk on your computer:
- Go to the Help page, enter your email address and order number, then click the Download button.
- A window will open asking what you want to do with a file called TopDesk1543Setup.exe. Click Save.
- Go to the location you saved the TopDesk1543Setup.exe file to and double-click on it.
- The TopDesk Setup Wizard will appear and guide you through the rest of the installation.
- After the installation has finished, TopDesk will automatically run and the TopDesk icon will appear in the system tray.
How will I know a new version of TopDesk has been released?
New releases are announced on the Otaku Software Blog and on the Otaku Software Forums. We love to hear feedback on new versions, so please feel free to drop by the Blog or Forums and let us know what you think.
If I have a question about how to use TopDesk, how can I get help?
If you have a question about TopDesk, click here to see if it's already been answered on the Otaku Software Forums. If you can't find an answer to your question in the Forums, click here to ask Otaku Software Support.
How do I report TopDesk bugs?
We treat all bug reports extremely seriously. We work hard to make sure TopDesk is as bug free as possible, and we always try to fix the problem as soon as we can. Click here to report a bug in TopDesk.
I have a suggestion on how to improve TopDesk, how do I let you know about it?
We're always happy to hear how we can make our software even better, and we welcome any suggestions or criticisms you have. Click here to let us know how we can improve TopDesk.